In this documentation entry, we will discuss in detail what a floating IP actually is and how it can be useful for your business. We are also going to look at how you can order the service using our console. So without any more waiting, let’s dive right in!
What is a Floating IP exactly?
Simply said, a floating IP is a publicly accessible IP address that can be easily transferred from one of your servers to another in a matter of seconds.
If you are switching between KVM VPS or Dedicated Instances you will be required to reboot the server when you attach to, or detach an IP address from it. This is to ensure that all of the changes are applied.
One of the main purposes of using floating IPs is that they can help minimize downtime significantly while also creating a highly available infrastructure. This can happen effortlessly as you can just transfer a given IP address from your main server to your backup server, allowing your business to continue running. This is extremely useful when you have to deal with scheduled or unpredictable downtime, which can be caused by routine maintenance or even hackers that are trying to take your website (or even server) down using DDoS or other types of cyberattacks.
However, as we mentioned in our floating IP announcement, we also offer DDoS-protected floating IPs, which are designed to completely mitigate any large volumetric attacks, while protecting your servers at all times. In addition to our traditional floating IPs, these DDoS-protected services come with a plethora of different customization options and monitoring tools, allowing you to set geo-filters, blacklist IPs and much more so that you can be in full control of your servers.
How to order a Floating IP?
You can easily order a floating IP through the console. Simply follow these steps.
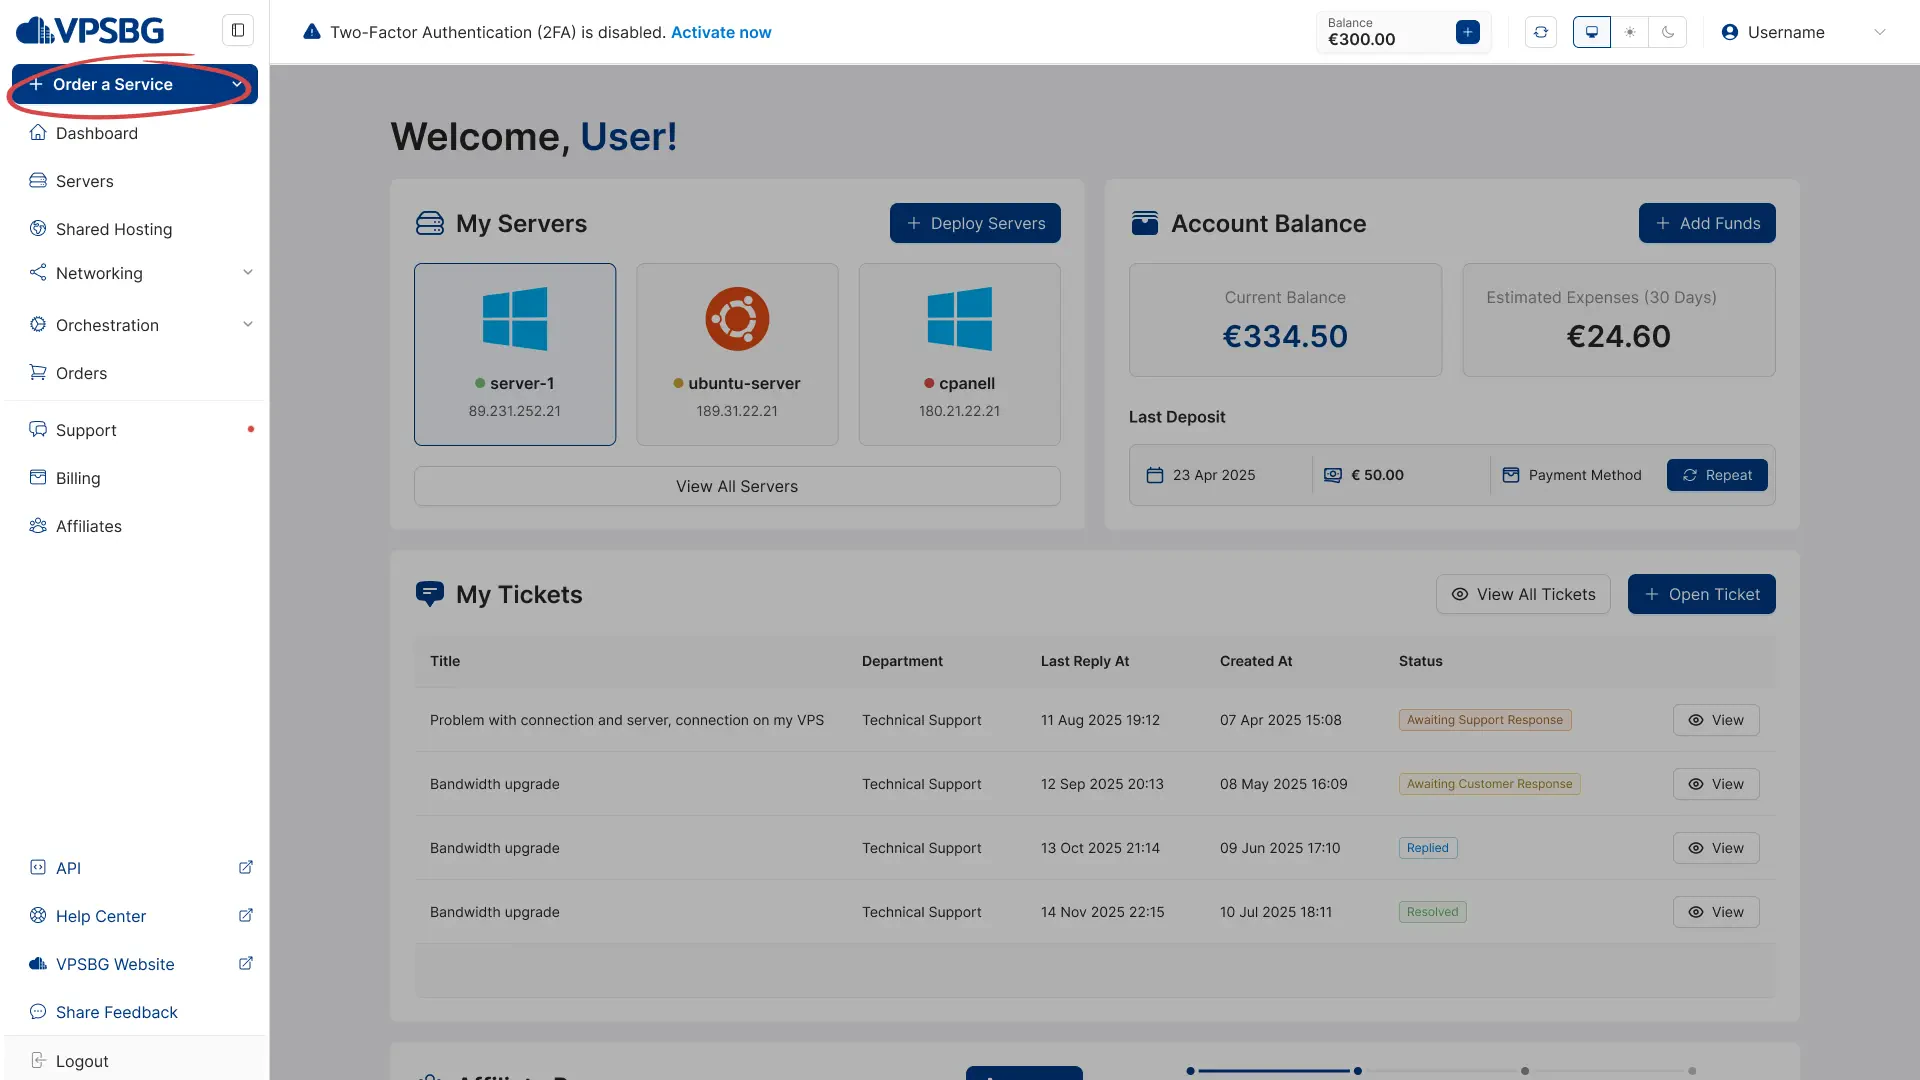
Firstly, click on the ‘New Service’ button as shown in the following image:
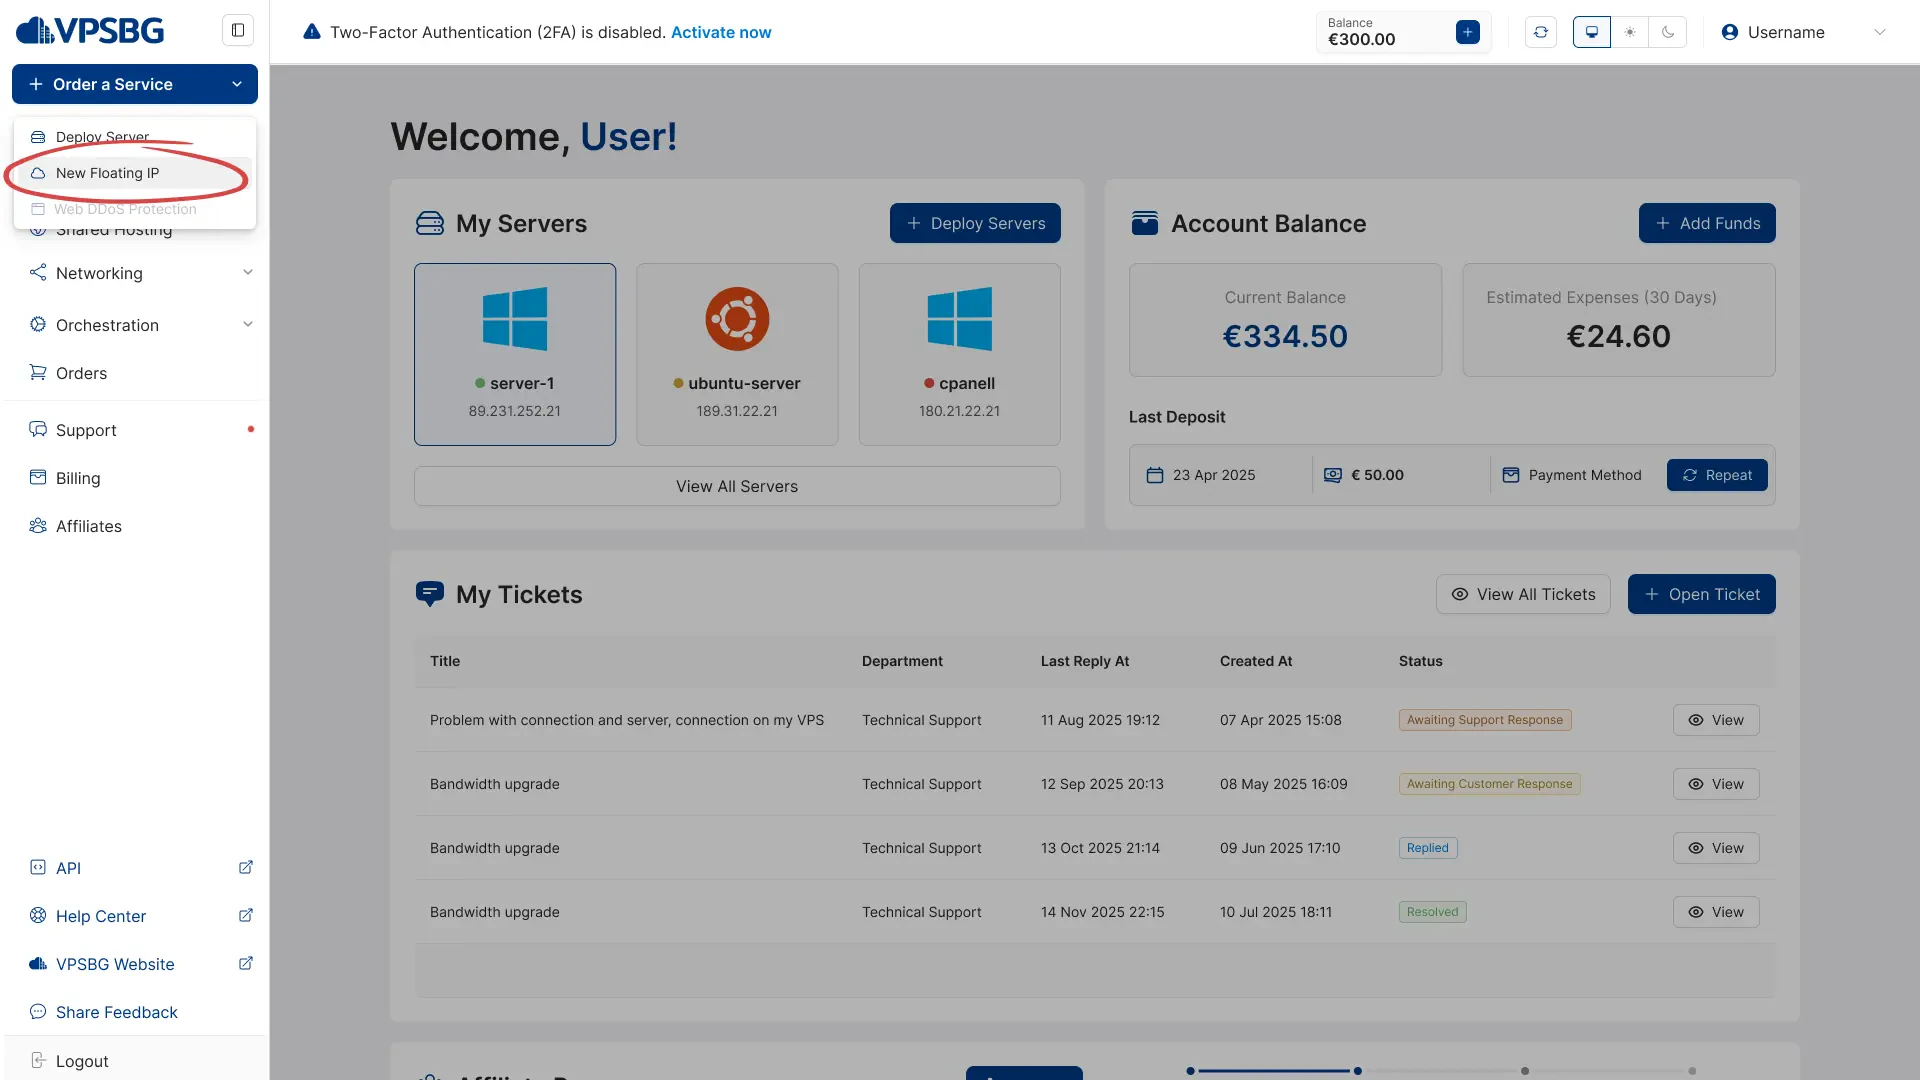
Next, click on ‘Order Floating IPs’, as illustrated below:
You will now see the following screen, which will allow you to select the amount of floating IPs and DDoS-protected floating IPs that you would like to order:
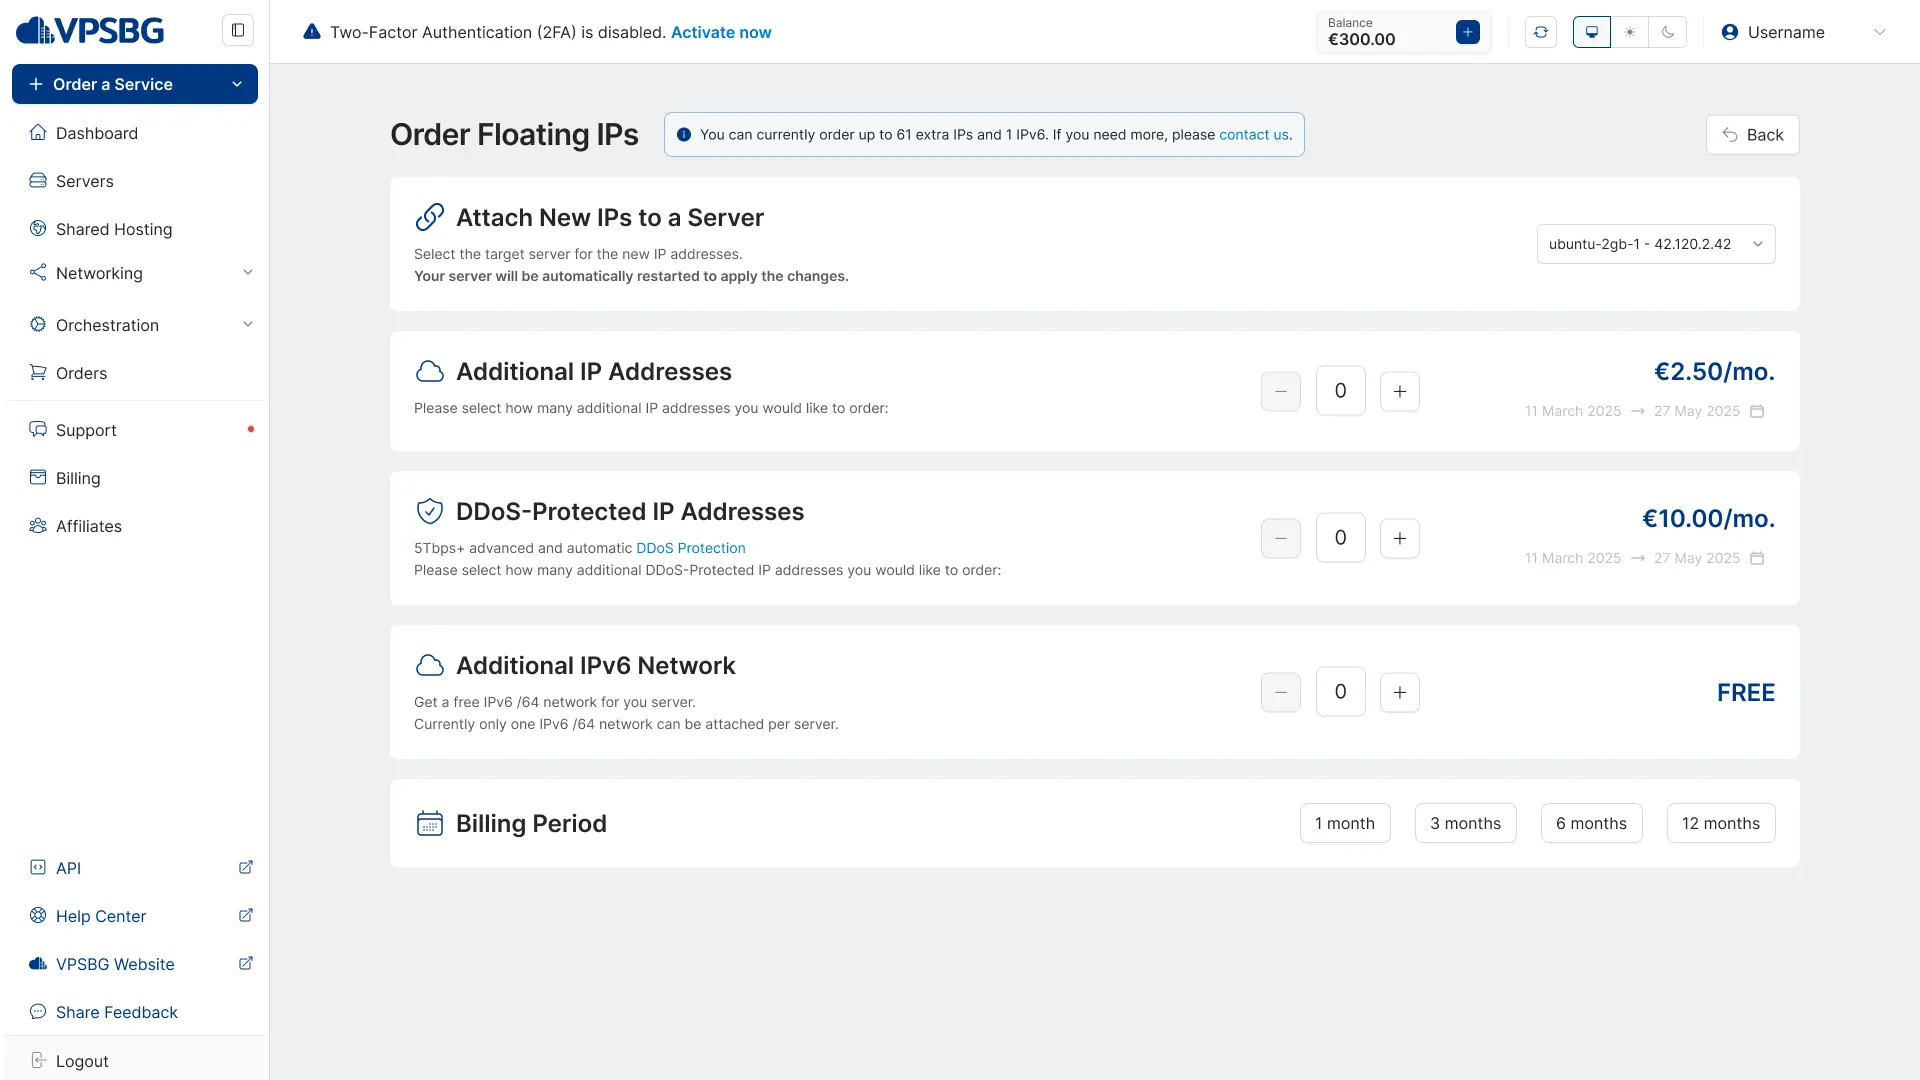
IMPORTANT: Our traditional and DDoS-protected floating IPs have a combined total cap of 64. This means that if you get 44 floating IPs, you will only be able to get 20 DDoS-protected floating IPs. If you wish to extend this limit, please contact us.
Once you have selected the number of IPs that you’d like, you have the option to immediately attach them to a given server by selecting one from the dropdown:
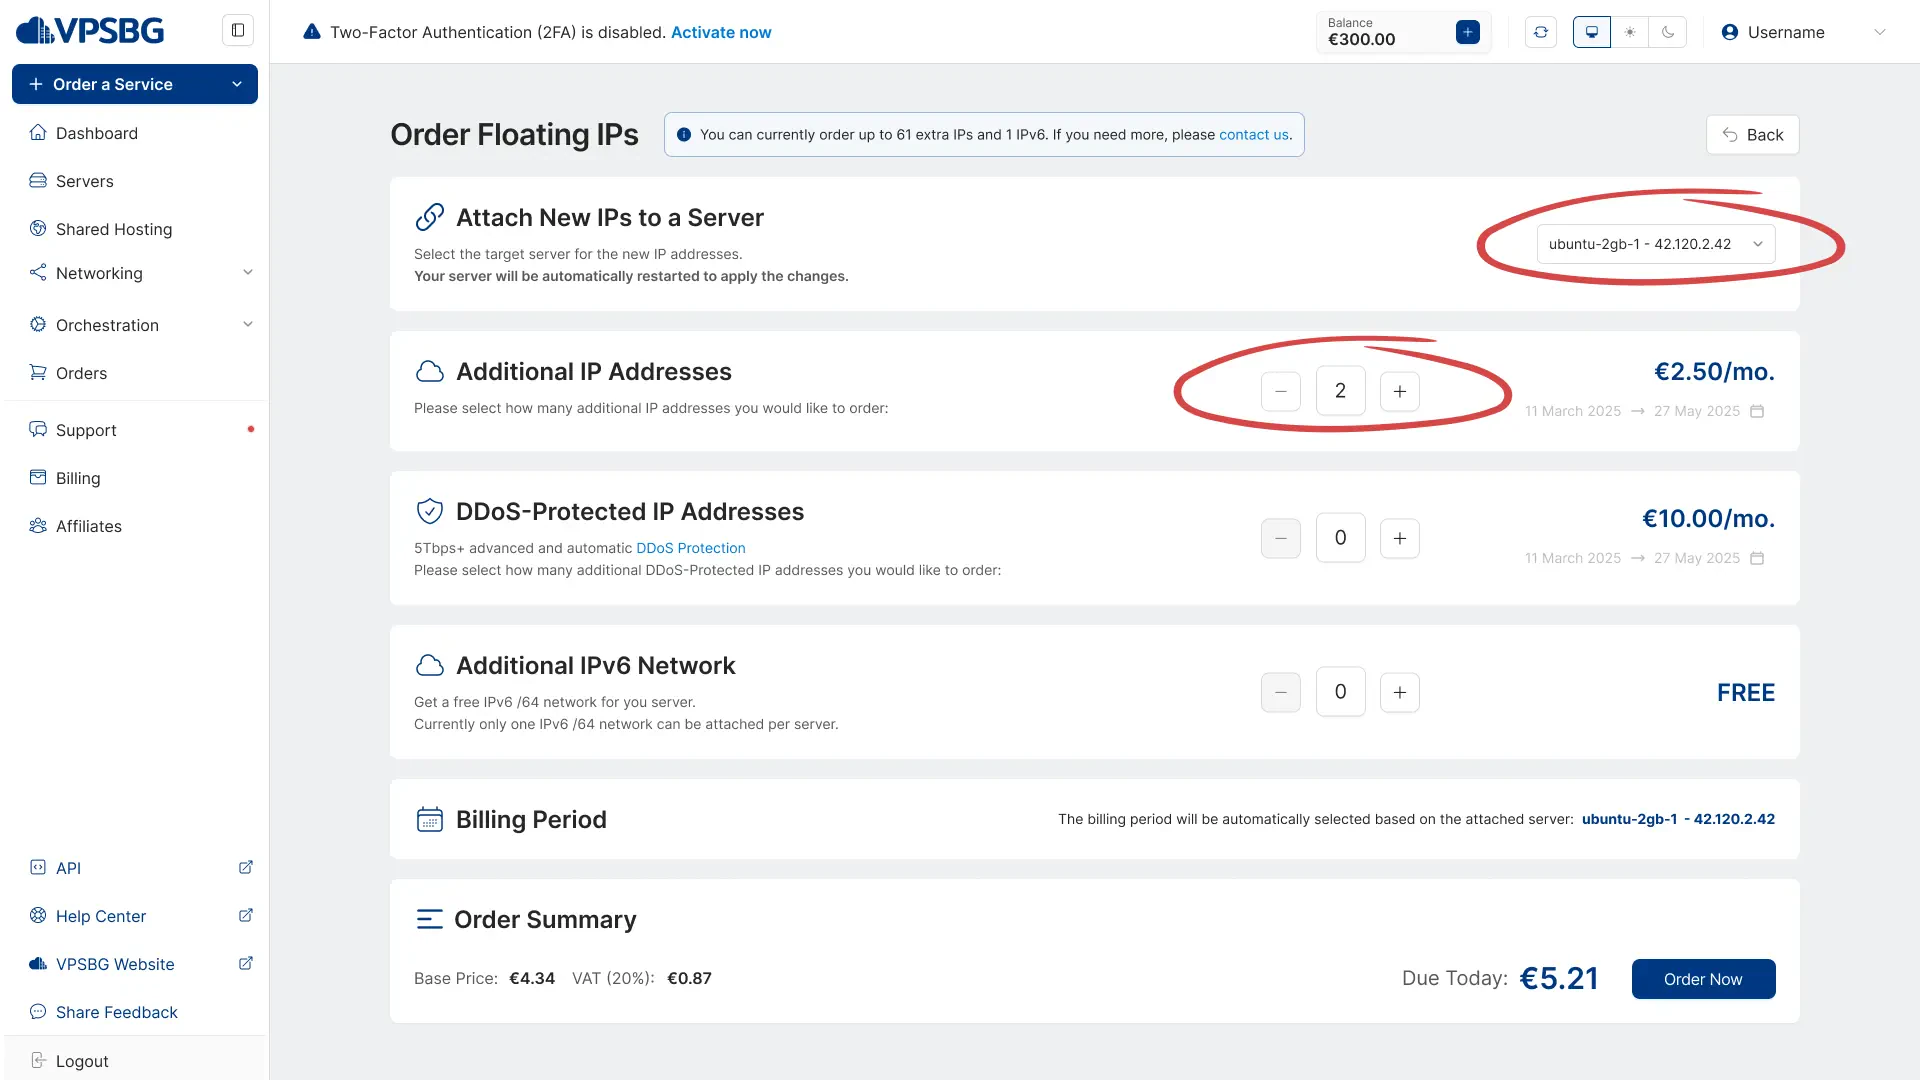
If you do attach the floating IPs, their billing cycle will be automatically synced with the billing cycle of the designated server. If you decide to not attach your floating IPs during purchase, you will have the option to manually select a billing cycle for your IPs.
That's it. If you have any questions regarding operating your floating IPs, you can read through our documentation entry on how to manage your floating IPs.
