How to create a VPN server with WireGuard and a Windows VPS
With the recent surge in popularity of Windows Server as an operating system and the ever-growing demand for online privacy, it is no surprise that many people are now looking to utilize cloud hosting as a way to protect themselves and their personal information.
Given the familiar user interface of Windows Server, it has become a staple for both newcomers and professionals in the field, making it the perfect foundation for a personal VPN server.
In this tutorial, we are going to show you how to create your own VPN server with WireGuard - a free VPN protocol and a Windows VPS server.
What you’ll need to install WireGuard on your Windows VPS
In order to set up your virtual Windows VPN server, you are going to need the following:
A virtual private server (VPS) with Windows Server as its operating system. While this tutorial does apply for many of the older versions, it is recommended that you go for the latest available one. It is also crucial for you to have administrative access to your VPS server as you are going to be installing and configuring your WireGuard VPN manually.
IMPORTANT: Windows Server does come with a license, it is not free like a Linux distribution. If you’d like to set up your own private VPN server, but don’t wish to spend extra on Windows Server, you can check out our tutorial on how to install WireGuard VPN on Linux.
You will also need to download WireGuard for Windows, which you can get from the official WireGuard website. Make sure to download the Windows Installer!
Finally, you are also going to need a text editing software like Notepad or Visual Studio. Any software is more than suitable as long as you can make changes to text.
How to install WireGuard VPN on Windows Server
Start by navigating to the WireGuard website and downloading the Windows Installer. Once your download concludes, navigate to the location where you downloaded the installer and simply double-click to open it.
This will fire up the installation wizard. Next, go through the required steps and complete the installation.
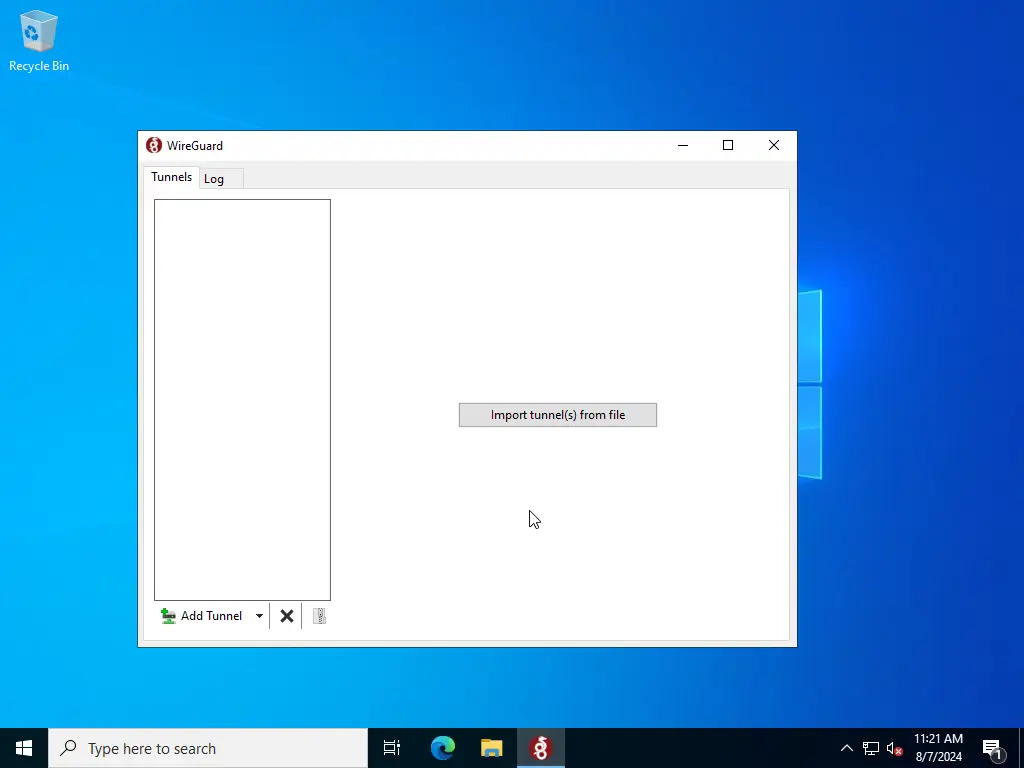
Once your installation has concluded, the Wireguard GUI panel should open automatically. If it doesn’t open, try manually opening it from the Windows Start menu.
How to create server keys and the configuration file
Right, that’s the easy part done. You are now going to have to generate your server keys as well as the configuration file that you are going to be using to set up the communication channels with the VPN.
Start by typing cmd in the search bar of your Windows Search and press Enter. This will bring up the command-line prompt, which you are going to be using to set up your WireGuard VPN.
Once you have cmd open, type the following command and press Enter:
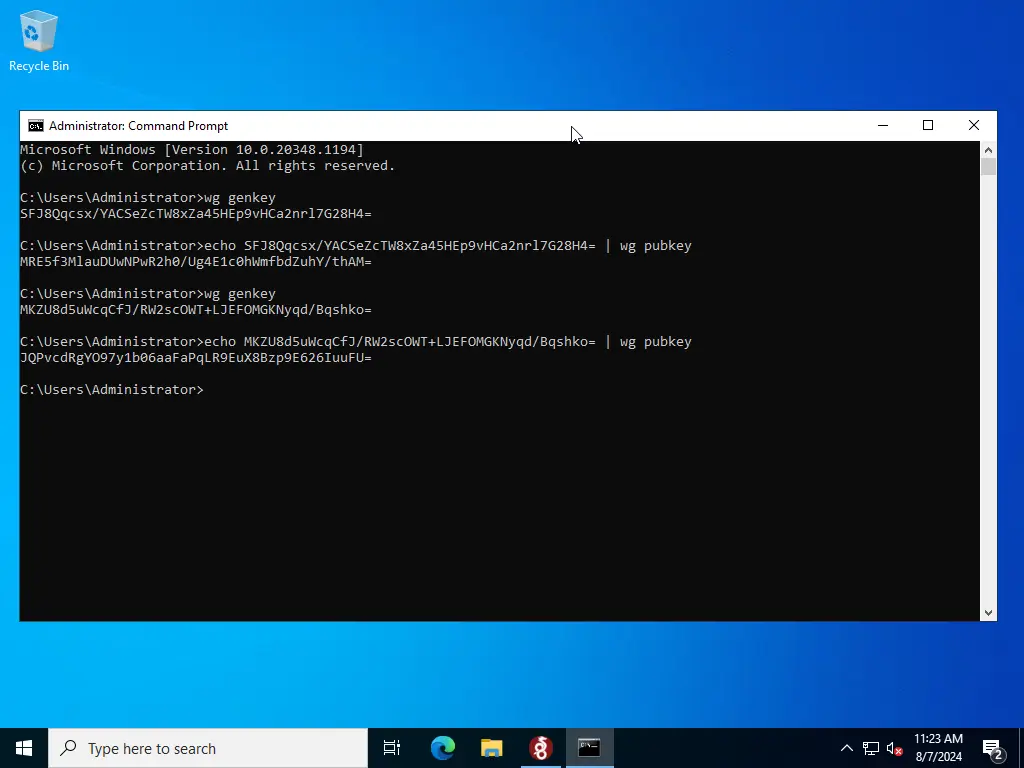
wg genkey
This command will instruct your server to generate a unique and cryptographically secure private key, which you will see as a long sequence of letters, numbers and characters.
We will need to create a total of 2 sets of key pairs - one for the server and one for the client application which we will be using to connect to the server. To create them, we will need to enter these additional commands one by one. Make sure to press Enter after each one!
echo <your-private-key-from-wg-genkey> | wg pubkey
wg genkey
echo <your-private-key-from-wg-genkey-2> | wg pubkey
Your command prompt window should look similar to the following screenshot:
IMPORTANT: You must not close the command prompt window until the end of the setup process as we will be using the generated keys in further steps. These keys play an important role when it comes to server authentication and connection establishment. Don’t share the private keys with anyone! You should also copy and paste the keys in a secure location!
Next, you are going to need to create the configuration file. Open up your text editor and create a new file. Click on File>Save as or CTRL + SHIFT + S to save the file before typing anything.
IMPORTANT: Make sure to select All Files from the Save as Type dropdown menu! Then choose a name for your file and add .conf to the end. An example full name would be ‘wg_server.conf’.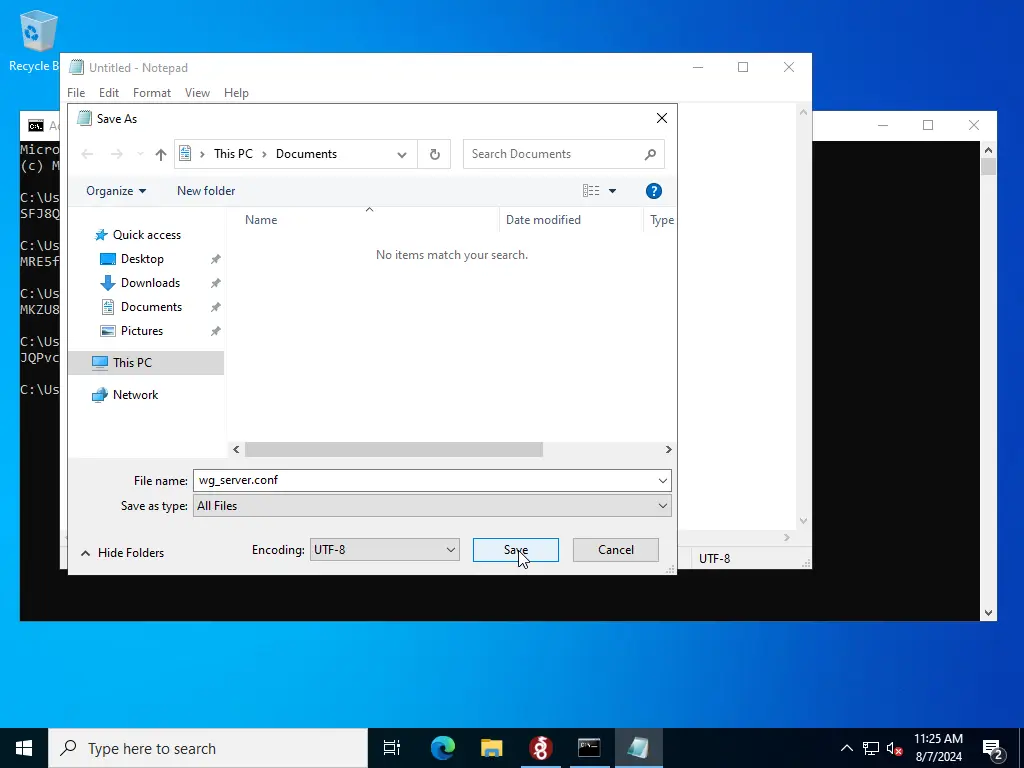
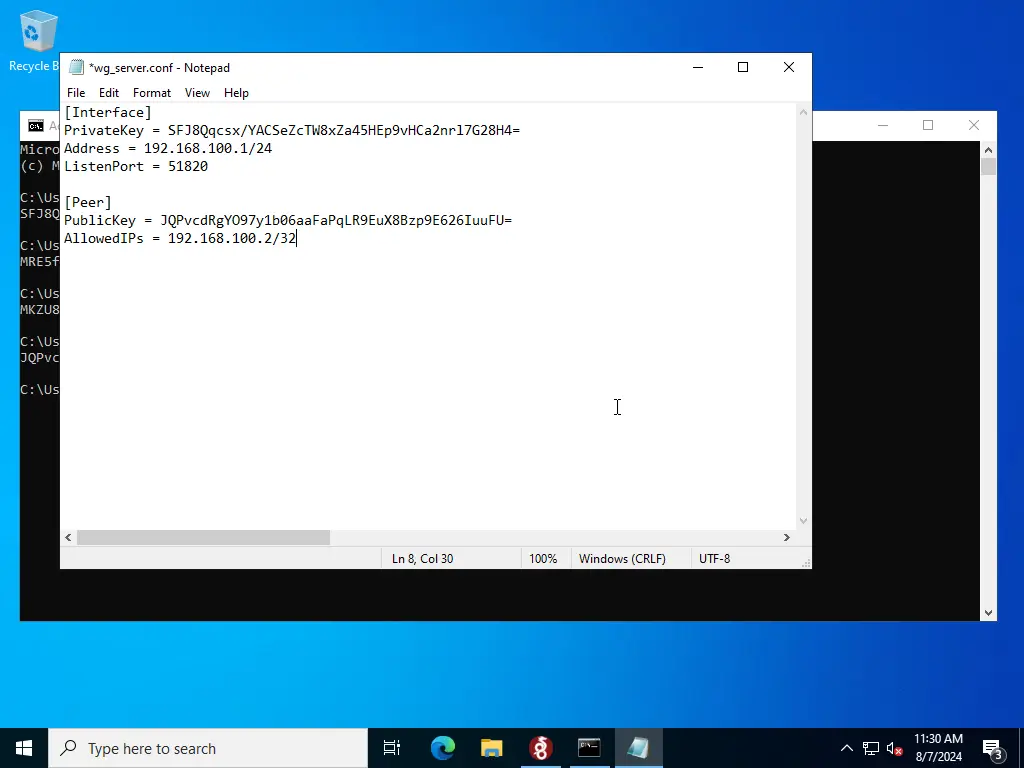
Now that you have created your configuration file, it’s time to add the required keys and information. Copy and paste the following content:
[Interface]
PrivateKey = [Your_Server_Private_Key]
Address = 192.168.100.1/24
ListenPort = 51820
[Peer]
PublicKey = [Client_Public_Key]
AllowedIPs = 192.168.100.2/32
IMPORTANT: The content above is just a placeholder that you need to replace with the correct information about your keys and network! Here’s a basic rundown:
- PrivateKey - place your private key generated with the first wg genkey command
- Address - this defines the IP address and the subnet mask for your WireGuard server within your chosen network range (e.g., 10.0.0.1/24, 192.168.100.1/24). Make sure that the subnet doesn’t cause a conflict with the existing network on your VPS server or your local network. Using “192.168.100.1/24” should be OK if you have not configured any other local networks or VPN software on your server
- ListenPort - enter an unused port number that you will want to use for WireGuard communication. The port associated by default with the Wireguard protocol is “51820”
- [Peer] Section - This section contains the information for all users that you want to allow to use the VPN by later filling in the public keys and allowed IPs
- PublicKey - We already have the generated public key for our client, so we can paste it. Use the output of the second echo … | wg pubkey command
- AllowedIPs - the IPs that the user is allowed to connect to via the Wireguard server, in this case this should be 192.168.100.2/32
Finally, save the file.
Once you’ve successfully saved the file, it is time to import it into your Wireguard instance. Go back into the Wireguard GUI and click on Import tunnel(s) from file. From there, select your saved file and finally click on Activate.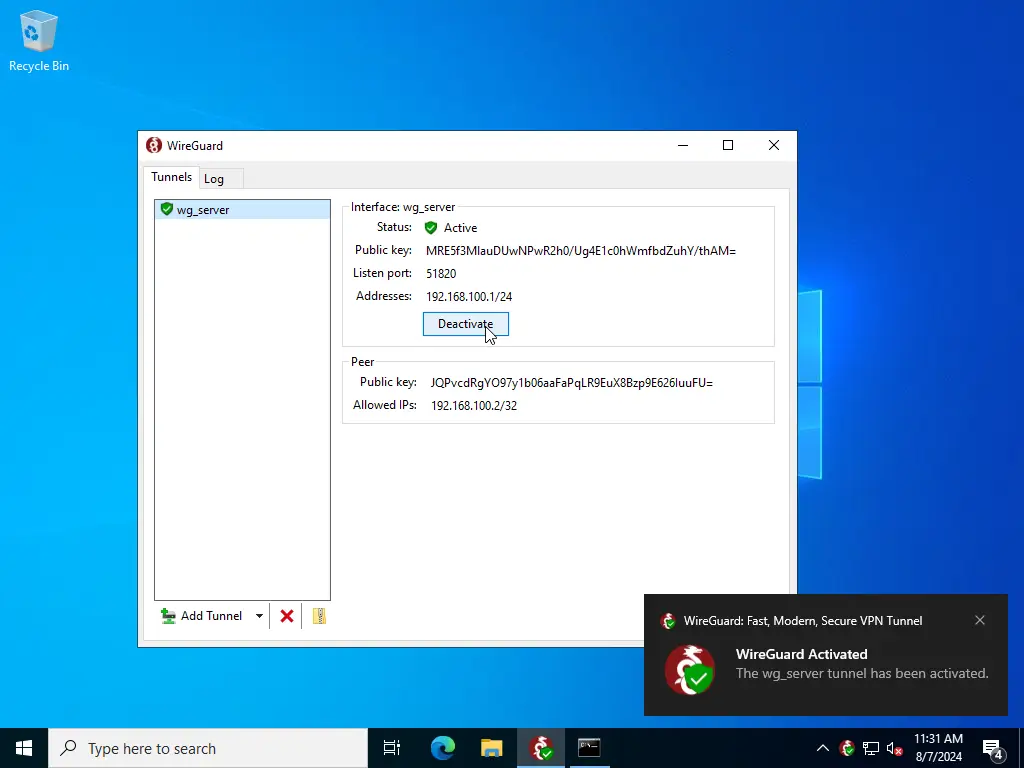
To allow Windows to forward traffic from the Wireguard tunnel to the default Windows network interface we need to enable “Internet Connection Sharing” for the Ethernet device. In order to do this, we need to navigate to Control Panel -> Network and Sharing Center -> Change adapter settings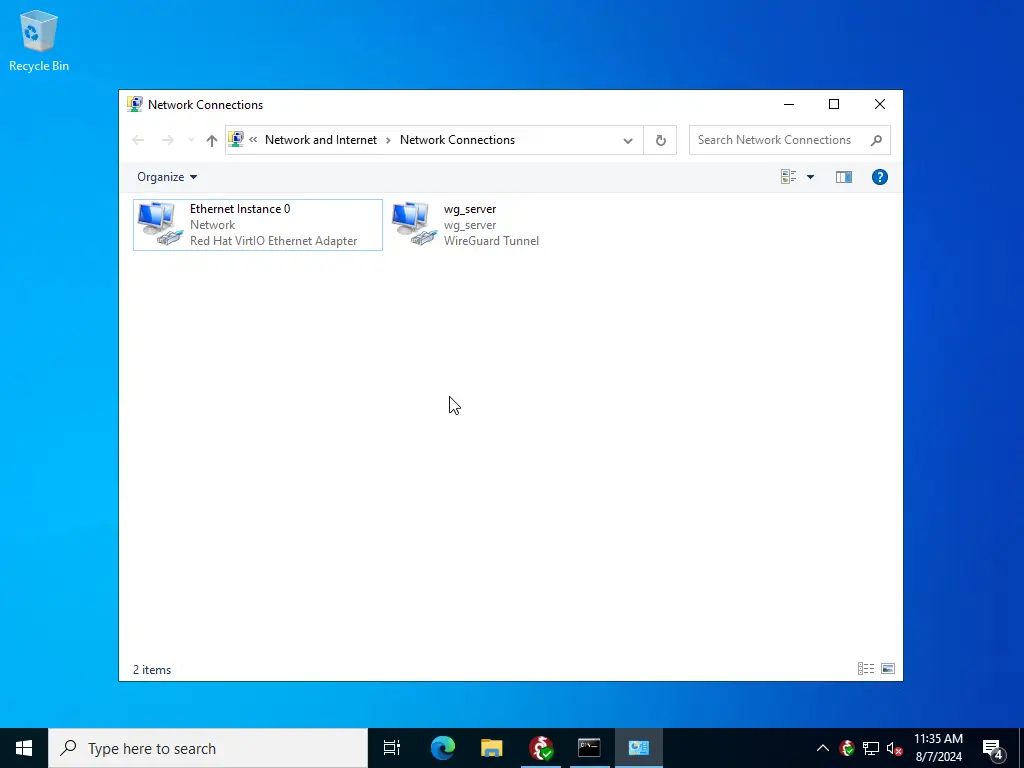
Next, right click on Ethernet Instance 0, select Properties and click on the Sharing tab at the top. Enable the checkbox Allow other network users to connect through this computer’s Internet connection and finally click on “OK”. If an informative box appears, just click on “OK” again.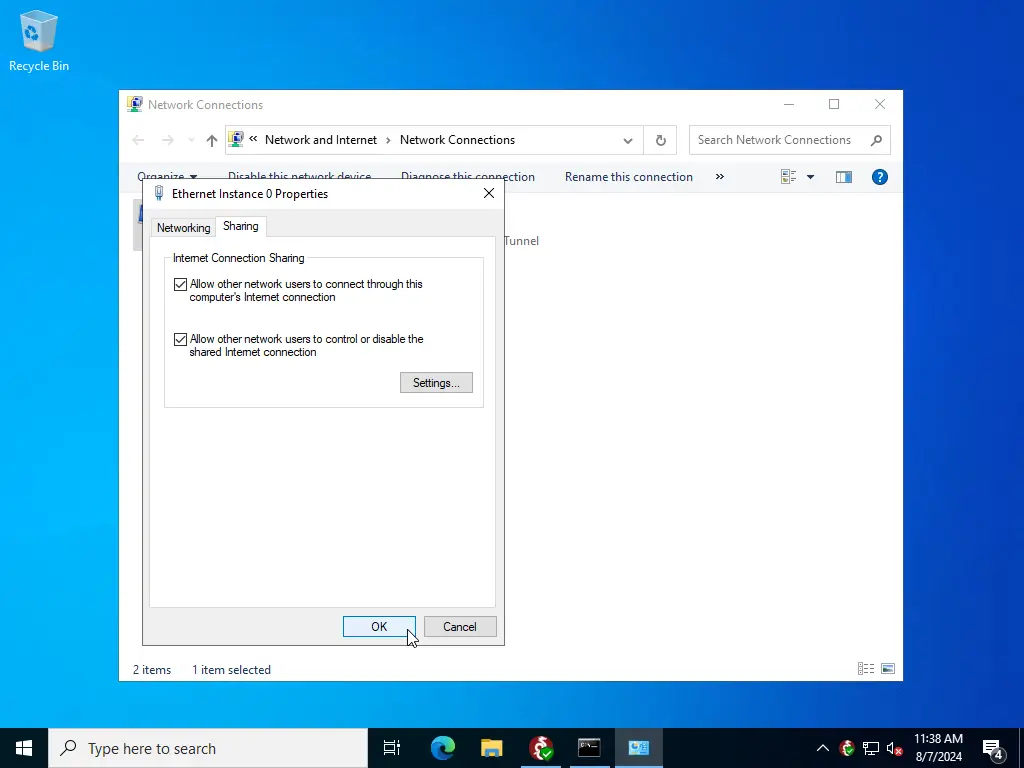
That’s it! Now we are ready to connect from a client device - for example another server, PC or a phone.
How to connect to your virtual Windows VPN server
To connect to your WIndows VPN server, you’d need to download the Wireguard software on your client device, just as you did in the first step of this guide, choosing the appropriate operating system. We will be using another Windows server as a client device.
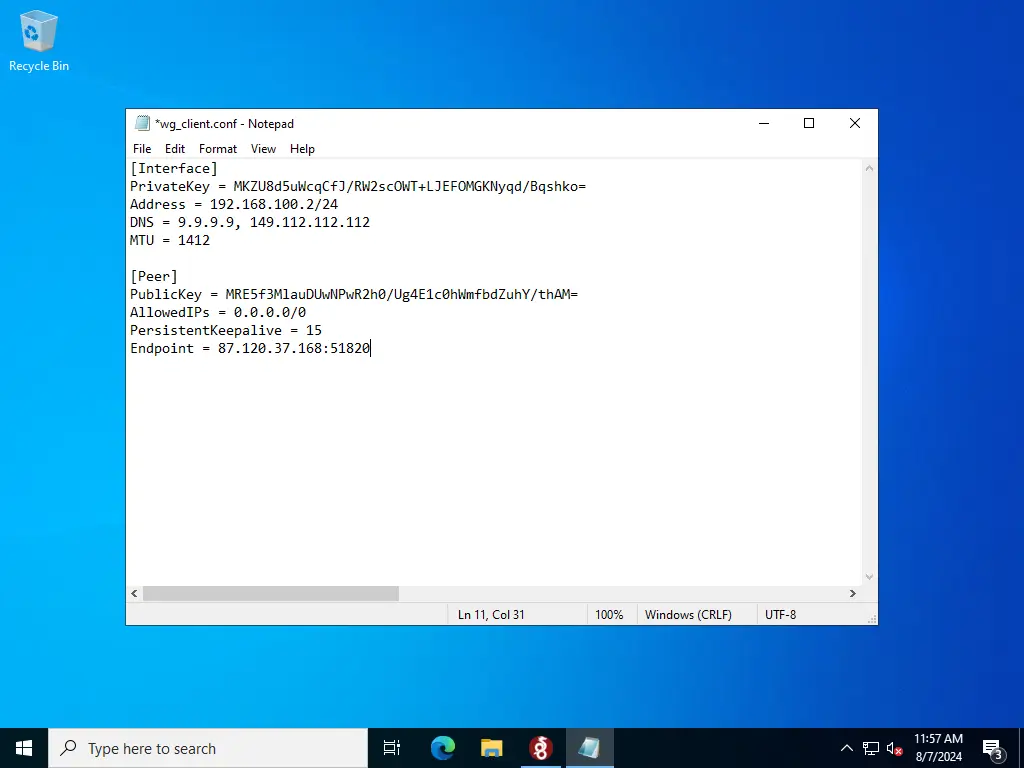
After downloading the Wireguard software, we need to create a client config. We will be using a very similar formatting to the server config. Open up your text editor, copy and paste the following content:
[Interface]
PrivateKey = [Your_Client_Private_Key]
Address = 192.168.100.2/24
DNS = 9.9.9.9, 149.112.112.112
MTU = 1412
[Peer]
PublicKey = [Server_Public_Key]
AllowedIPs = 0.0.0.0/0
PersistentKeepalive = 15
Endpoint = [Windows_Server_Public_IP_Address]:51820
IMPORTANT: The content above is just a placeholder that you need to replace with the correct information about your keys and network!
- PrivateKey - place your private key generated with the second wg genkey command - here you need the client private key
- Address - this defines the IP address and the subnet mask for your WireGuard client, as defined in the server’s config file under the [Peer] block
- DNS - enter the IP address of the DNS server that anyone connected to the VPN will use. We will be using the Quad9 DNS servers in this guide
- MTU - MTU stands for Maximum Transmission Unit. It defines the largest packet size that can be transmitted over the network. For WireGuard, it's usually best to set this to 1412 bytes
- PublicKey - We already have the generated public key for our client, so we can paste it. Use the output of the second echo … | wg pubkey command
- AllowedIPs - the IPs that the user is allowed to connect to via the Wireguard server, in this case this should be 192.168.100.2/32
- PublicKey - This is the public key of the WireGuard server you're connecting to. You'll get this from the server's configuration. Use the output of the second wg genkey command
- AllowedIPs - This defines which traffic should be routed through the VPN. 0.0.0.0/0 means all traffic will go through the VPN
- PersistentKeepalive - This sends a keepalive packet every 15 seconds to maintain the connection
- Endpoint - This is the public IP address and port of the WireGuard server you're connecting to. Set it to the outgoing IP address of your Wireguard VPN server
Save the file, import it in the same way you imported the server config and activate it.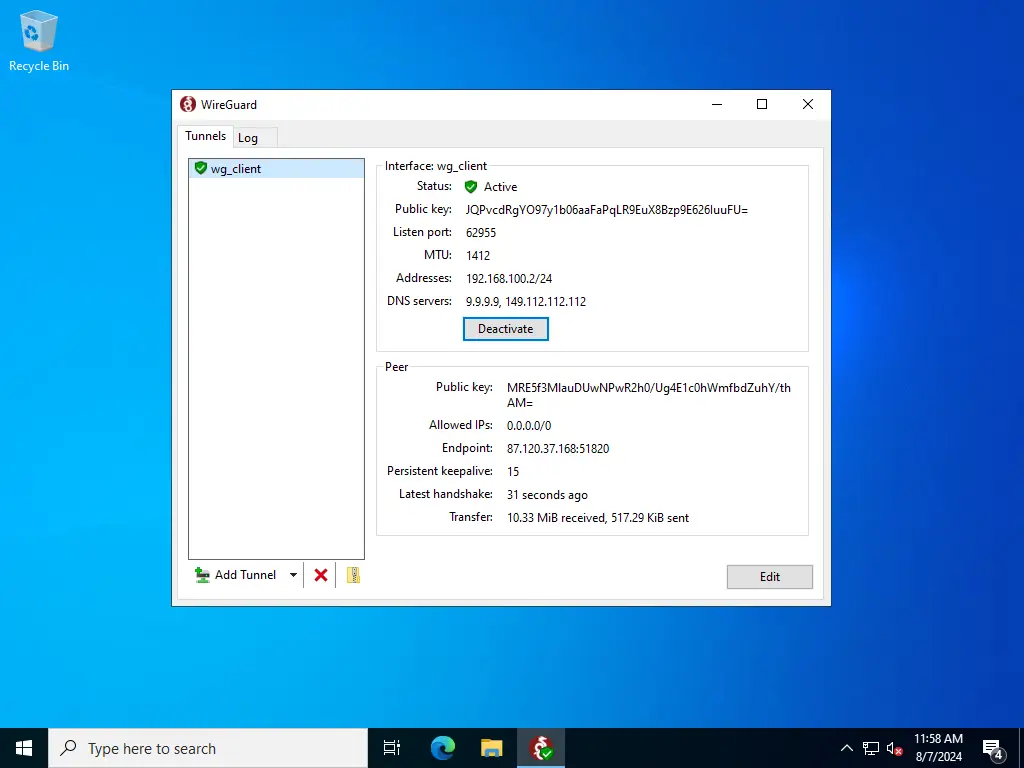
That’s everything! Be sure to test the connection in your browser.
If you encounter any problems during the configuration, do not hesitate to contact our support team!

